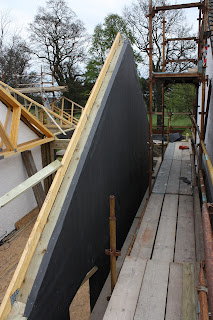
Once the floor joists and in place a binder is attached basically to make a surface for the kit to sit on and be fixed square with the foundations. each section of kit is built in situ. Firstly the wall panels are constructed using 145x47 mm C16 timber. it is important to check the squareness of the timber regularly before applying the osb. uprights are positioned at 600 centres to ensure that there is a timber for the exterior sheets of osb (2400x1200) to be fixed to. Between the uprights dwangs are fixed in order to keep the panel square and to provide extra strength.
Any opening in the kit will need reinforcement so extra uprights are added around the opening to take the extra load. A lintel is required normally using 2 or 3 lengths of 195x47 c16 timber. If the opening is over 2.1 m a 9mm thick flitch beam is added between the c16's and bolted together at 600 centres with m12 bolts and washers. When an opening is over 3m the flitch beam is required to be 12mm thick and so on.

Once the walls are constructed the roof trusses are brought onto the walls. The truss sizes are previously calculated by the manufacturer and are brought to site but lorry. Sometimes trusses are instantly brought into position and fixed using a crane. But some builders who prefer to save the money , or when a site doesn't have crane access it just involves a lot of hard work and effort to be lifted by hand. Which is what my Dad decided to do.
From this point a truss is fixed at the gabel end to be used as template to construct the kit for the gabel end. Again this is constructed in the same way as the previous panels.
The exterior surface of the osb board is covered with a water proof fabric. This ensures that any moisture in the cavity caused by differing interior and exterior temperatures or weather conditions does not penetrate the kit causing rot or dampness.
From this stage the trusses are then brought into position . An exterior layer of block work in this instance will protect the kit from the elements and a render or cladding then applied. kit ties hold the kit and exterior wall together.


No comments:
Post a Comment